-
6 Reasons Why You Should Get an iPad Magic Keyboard

Go to OSX Daily to read 6 Reasons Why You Should Get an iPad Magic Keyboard The iPad Magic Keyboard is ultra popular for good reason, and it’s easily the best accessory available for iPad. With the excellent functionality of a full-size backlit keyboard combined with a great trackpad, Magic Keyboard brings productivity potential to…
-
How to Remove DS_Store Files from Git Repository
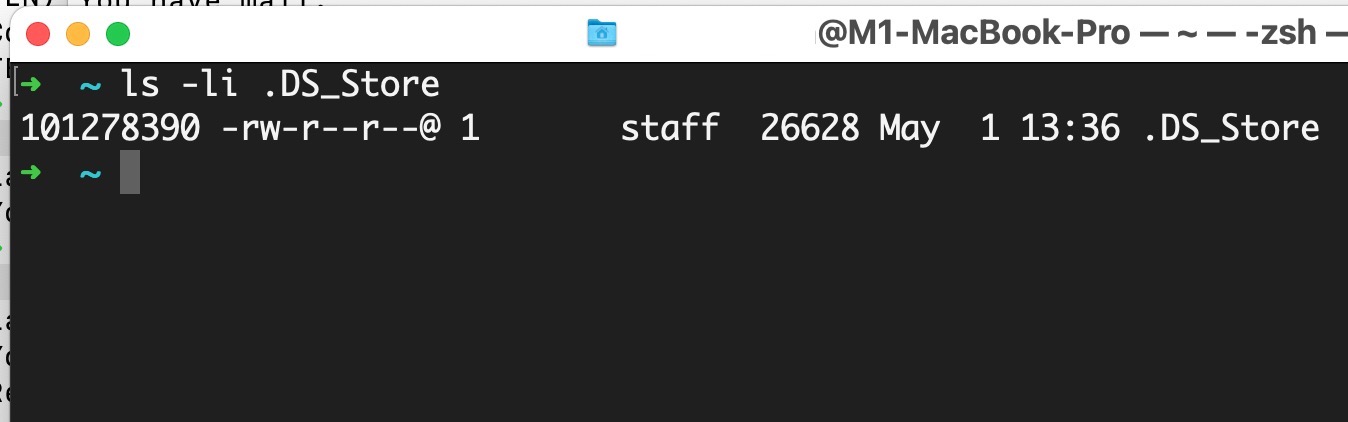
Go to OSX Daily to read How to Remove DS_Store Files from Git Repository If you use git on the Mac platform, you likely have come across DS_Store files in a git repository. These can be annoying and clutter a git repo, and you may even run into unnecessary conflicts due to .DS_Store files being…
-
How to Check AppleCare Warranty Coverage on iPhone & iPad

Go to OSX Daily to read How to Check AppleCare Warranty Coverage on iPhone & iPad You can now easily check your AppleCare warranty coverage right on the iPhone or iPad, for not only your device, but also any other devices that are paired to it, like AirPods or Apple Watches. All Apple devices come…
-
List a Macs Local IP Address History Over Time or from Specific Dates

Go to OSX Daily to read List a Macs Local IP Address History Over Time or from Specific Dates If you ever find yourself needing to know a history of a specific Macs assigned local IP addresses, you can find this potentially helpful networking information from the command line. This trick will report all local…
-
How to Add Apps to MacOS Finder Toolbar
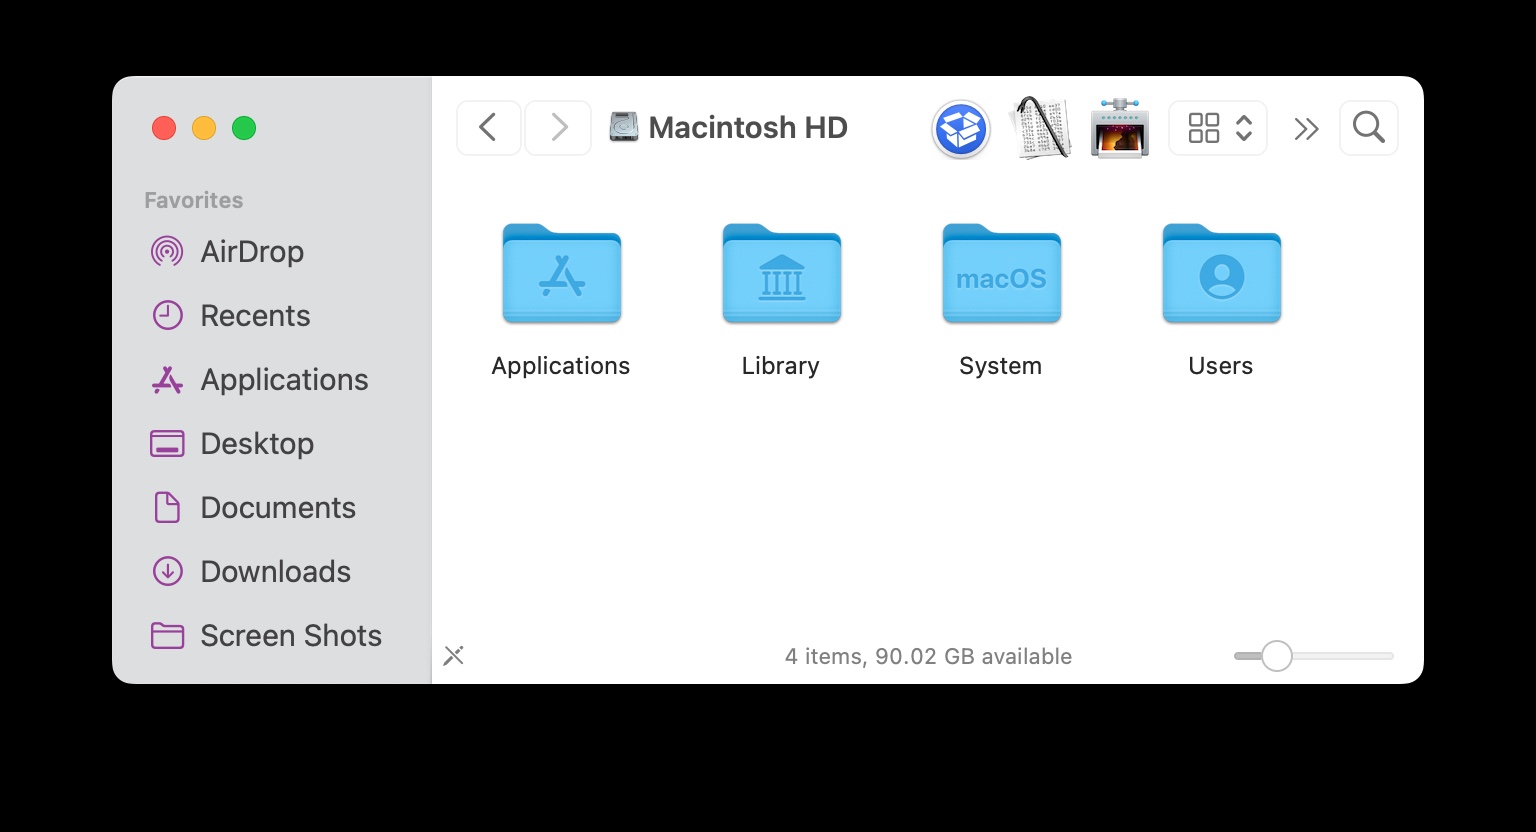
Go to OSX Daily to read How to Add Apps to MacOS Finder Toolbar If you have some frequently used applications on the Mac that you routinely launch from the Finder, you can customize the Finder toolbar to include those apps. This offers a helpful alternative to launch frequently used apps that is Finder specific,…
-
7 Useful Reasons to Use AirPlane Mode on iPhone

Go to OSX Daily to read 7 Useful Reasons to Use AirPlane Mode on iPhone While AirPlane Mode for iPhone has been around since the earliest days of the device, many users still do not understand how the feature works, or why it is potentially useful. With that in mind, we’re going to review a…
-
How to Find How Many CPU Cores a Mac Has

Go to OSX Daily to read How to Find How Many CPU Cores a Mac Has Knowing the number of CPU cores a particular Mac has can be useful for performance optimization, stress testing, compatibility, and to otherwise make informed decisions about system performance on a Mac. For example, maybe you want to make sure…
-
7 Battery Saving Tips for Gaia GPS for iPhone

Go to OSX Daily to read 7 Battery Saving Tips for Gaia GPS for iPhone Gaia GPS is a popular app amongst outdoor enthusiasts, but one of the apps downsides is that it tends to drain a lot battery life on your iPhone. If you wish to save battery life and optimize how long you…
-
How to Access Bing GPT Chatbot from Microsoft Edge on iPhone & iPad
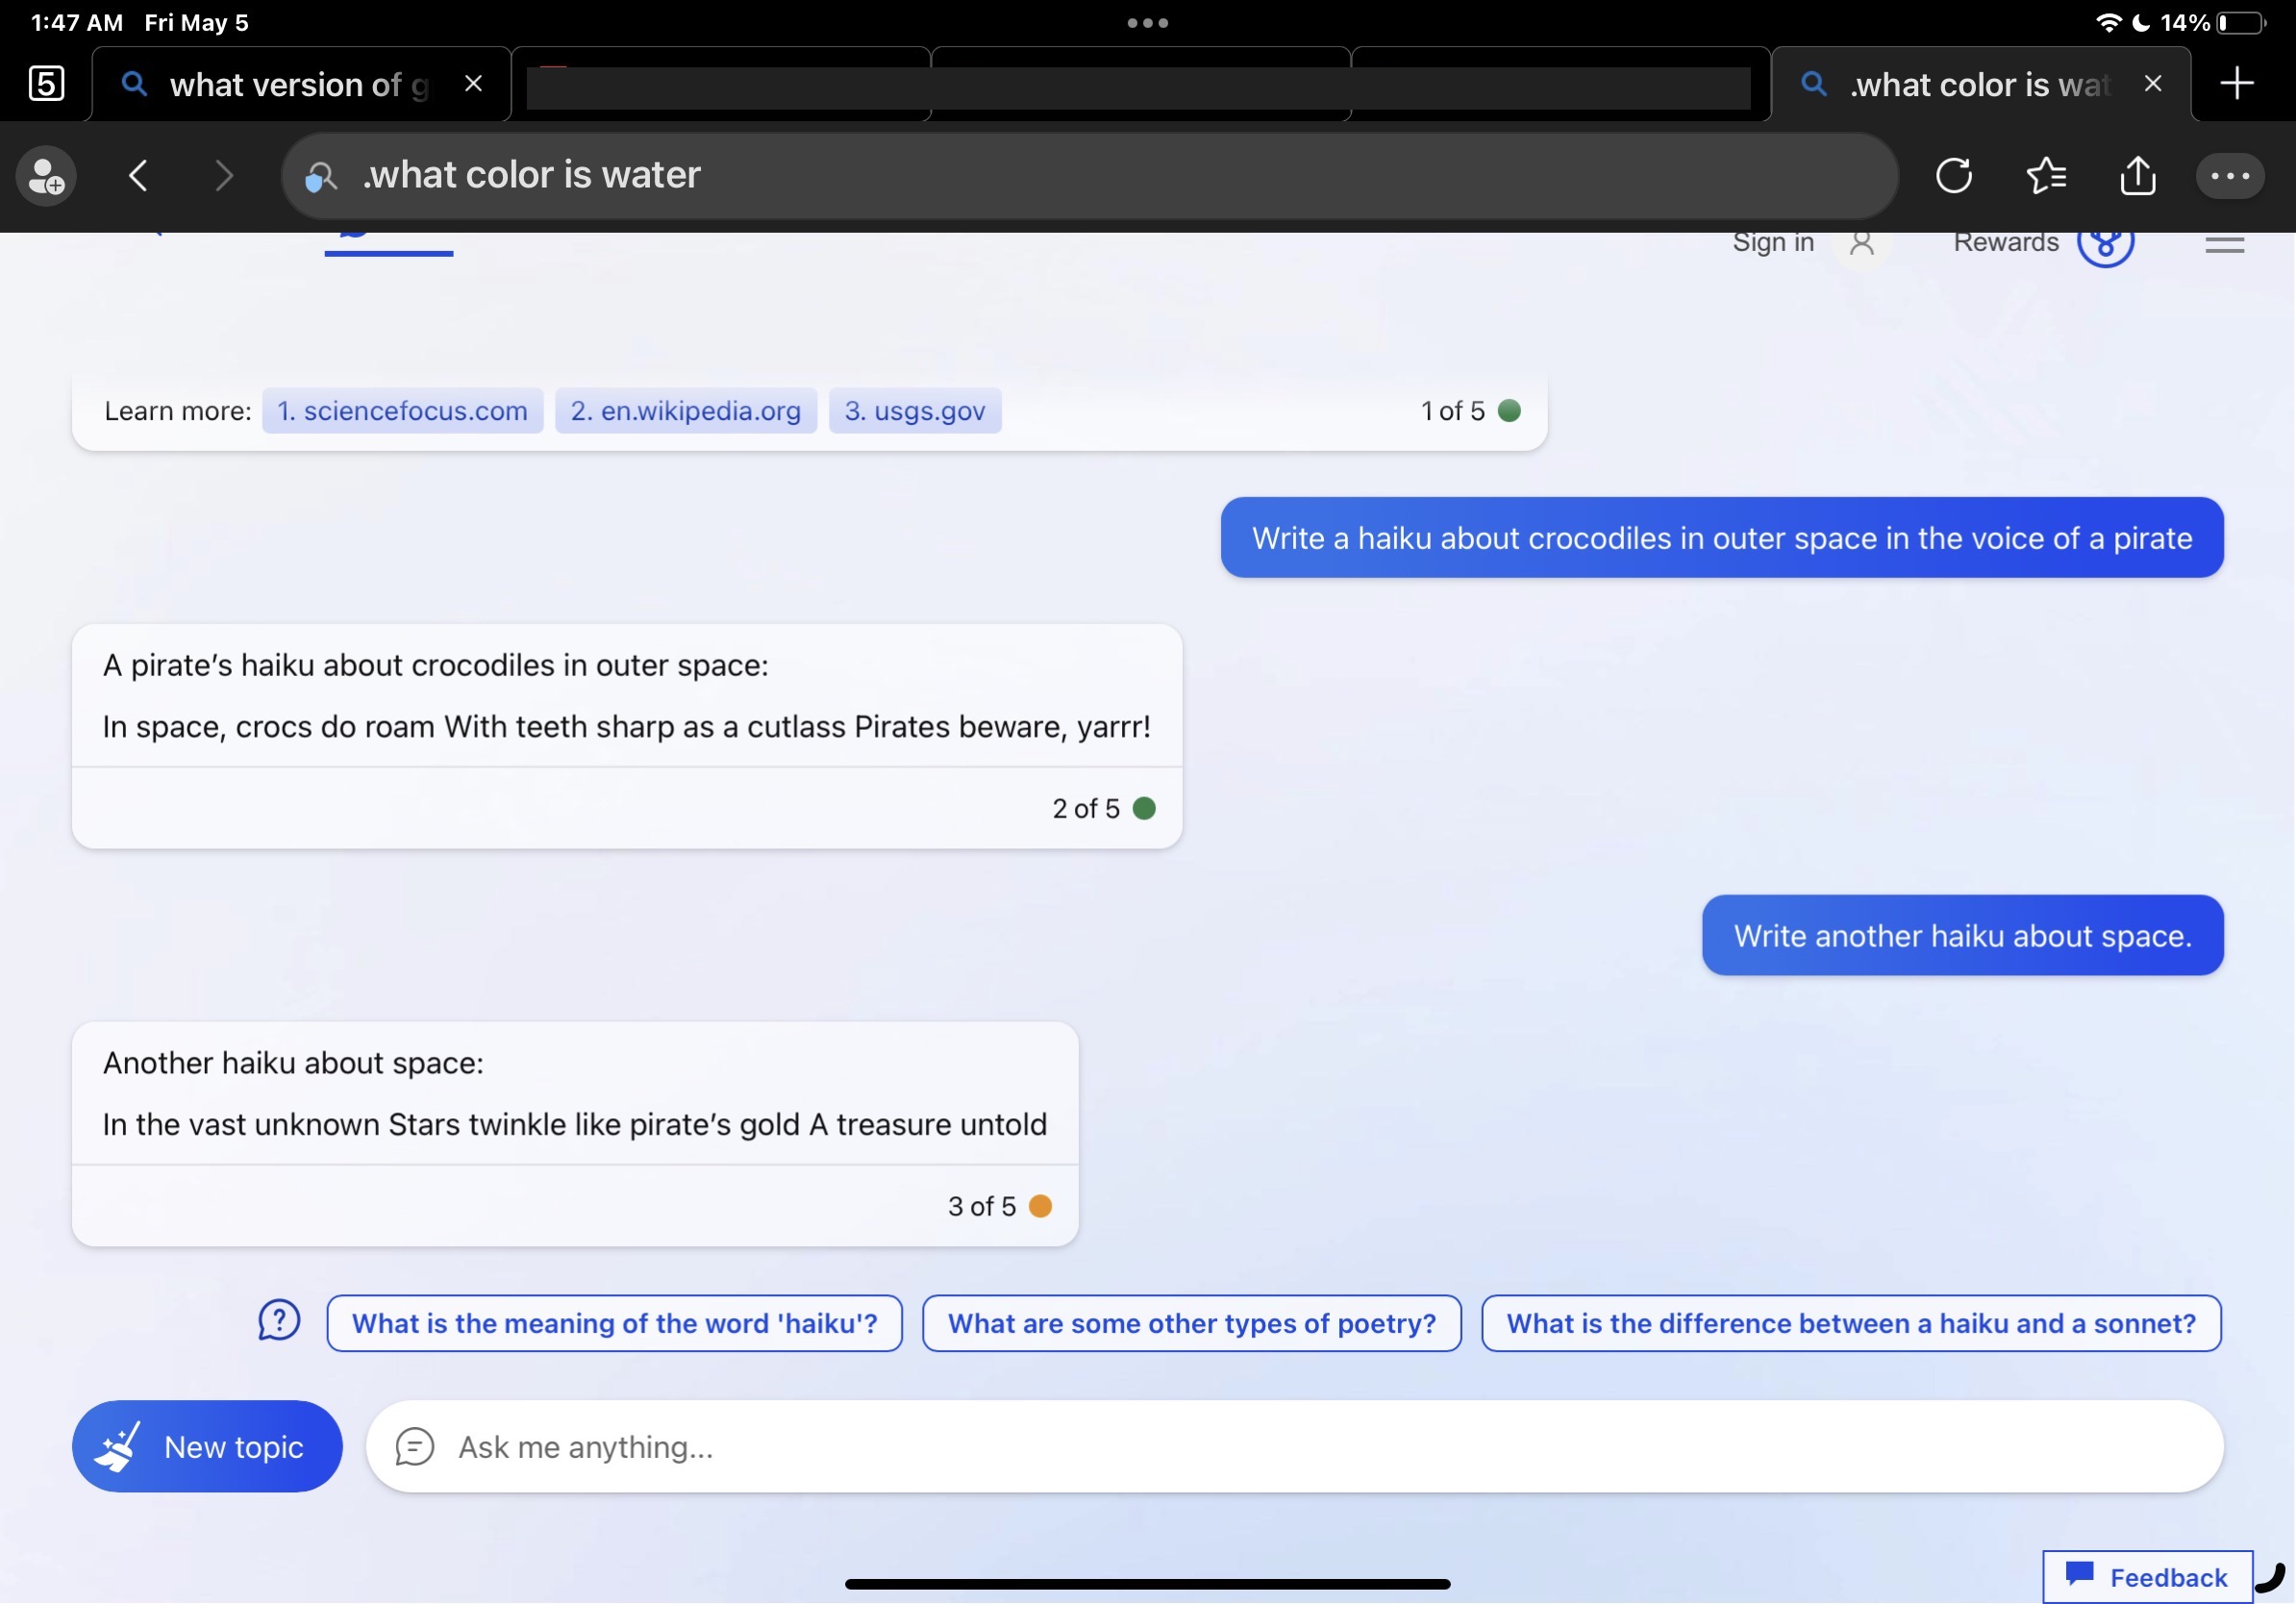
Go to OSX Daily to read How to Access Bing GPT Chatbot from Microsoft Edge on iPhone & iPad The latest versions of Microsoft Edge web browser for iPhone and iPad, and the Bing search engine itself, include integrated AI-powered chatbots that can be accessed and queried at anhy time. Why not take advantage of…